Smart Zone Bed Set Up
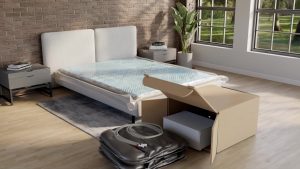
Your new Nautica Home Smart Zone Bed arrives compressed in two boxes. Box 1 includes the compressed mattress assembly. Box 2 includes the air cores, processor and hand controls.
Getting Started
Open all boxes. Make sure you have all of the components listed above. If you are missing any item(s), please contact a Sleep Specialist toll free at 1-800-289-2693.
Decide where to place your new Smart Zone Bed. Make sure that there is an electrical outlet nearby.
Assemble your bed frame (sold separately). If using a slat support system and not an adjustable bed base or heavy duty metal bed frame, make sure to position the slats evenly to support the foundation. If your bed has fewer than three slats, we suggest adding additional slats to ensure adequate support of your Nautica Home Adjustable Air Number Bed.
Surge protector recommended. Your limited warranty does not cover damage due to a power surge, regardless of the source. See warranty terms for complete details.
Smart Zone Bed Set-Up
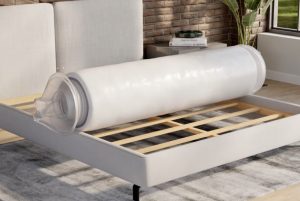
Remove the compressed and rolled mattress from Box 1 and place on your adjustable base, platform bed frame or foundation.
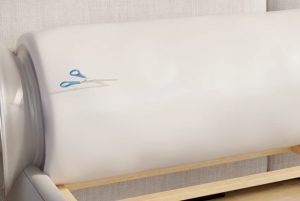
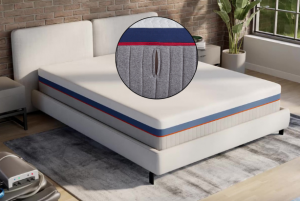
Cut the vacuum-sealed plastic around the mattress and unroll. Avoid using sharp tools that may damage the material.
Remove the air cores, air processor and hand controls from Box 2.
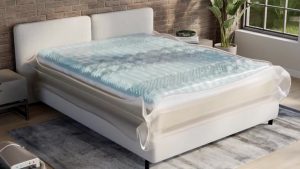
Allow the mattress to expand fully in less than one hour.
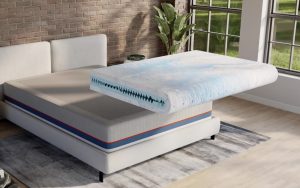
Remove the plastic cover and set aside the foam comfort layer to install at a later step.
Center expanded mattress on your foundation or frame with the opening in the cover for the air hoses at the head of the bed and the cover zipper pulls at the foot of the bed.
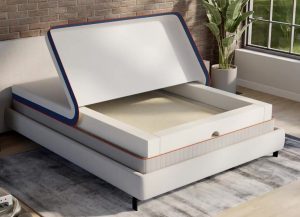
No need to take the cover off. Unzip and roll the cover to the head of the mattress.
Remove the fire barrier and set it aside to install at a later step.
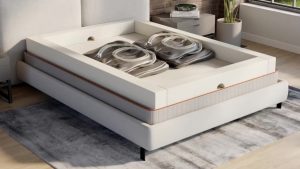
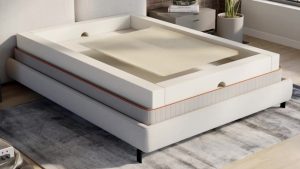
Place the two uninflated air cores side by side in the support tray and ensure the hoses face the head of the bed.
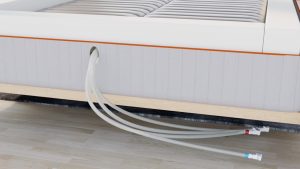
Insert the air hoses through the hole at the head of the bed. Make sure hoses are not kinked. All excess hose should be pulled through the opening. A 2-Zone Smart Zone Bed will only have 2 hoses.
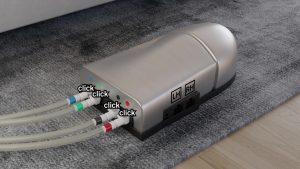
Place air processor under the hoses protruding from head of bed. Connect color coded hoses to the corresponding color coded nozzles on the processor. Hoses will ‘click’ when securely connected. A 2-Zone Smart Zone Bed will only have two color coded hoses.
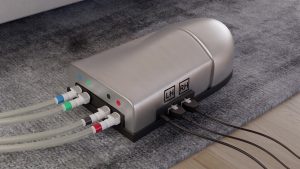
Attach one hand control to the ‘LH connector and one to the ‘RH’ connector on the air processor. Plug the processor into a surge protector.
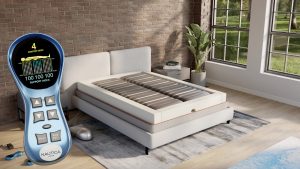
Fully inflate the air cores by pressing the auto fill button on each control. Standing at the foot of the bed the ‘LH’ control operates the left side and the ‘RH’ control operates the right side of the bed.
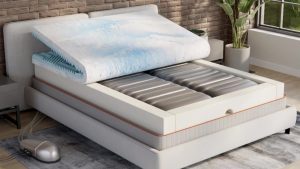
Recenter the air cores inside the foam support tray. Then return the foam comfort layer to the top of the inflated air cores. Make sure the foam comfort layer is centered on top of the air cores.
Cover the foam comfort layer with the fire barrier down to the support tray, and make sure the elastic bands of the fire barrier cover are tucked under the entire foam support tray to prevent bunching.
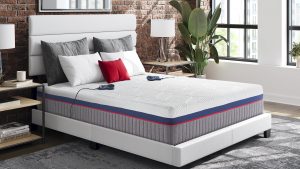
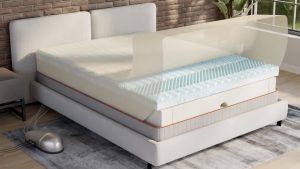
Pull the top cover back over the fire barrier and re-zip into place. You are now ready to enjoy your new Nautica Home Smart Zone Bed. Please allow up to 72 hours for the foam to completely expand to its original size and shape.
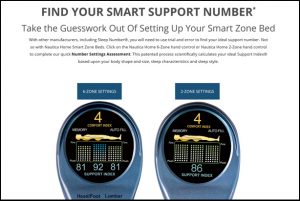
Find your number and enjoy a better night’s sleep. Our patented process scientifically calculates your ideal Support Index® based upon your body shape and size, sleep characteristics and sleep style.